


Table of contents
- Registering a Telegram Bot
- Creating a Code Repository
- Cloning the Repository
- Initializing the Project
- Linking the Repository to Netlify
- Adding the Bot Token
- Setting the Webhook
- Write the Serverless Function
- Responding to Messages
- Refactoring sendMessage
- Better Local Development with Netlify Dev
- Making the Bot Understand Message Structure
- Responding Conditionally to Commands
- Using Hashnode's GraphQL API
- The Final Push
- Telling Telegram about the Commands
- Ideas for the Future
Want to build a bot on a messaging platform? You can use Netlify and their Functions feature to get up and running quickly and easily. In this article, you'll see how I built a bot for Telegram with nearly unlimited potential for interacting with users. I'll be showing how I integrate with Hashnode's GraphQL API to connect your bot's users with quality articles from other tech writers.
If you follow along, you'll be able to write your own bot that interacts with third-party APIs, too.
Registering a Telegram Bot
I wanted to register my Telegram bot first because this is where I could choose a name. I needed to make sure the name I wanted wasn't taken. Note that Telegram bot names must end with "bot".
I named mine partiibot.
Telegram bots are created by chatting with the BotFather. Yes, that's an official bot Telegram provides to let others manage their bots.
In a chat with BotFather, I created a new bot
/newbot
It asked me for a name and a username. I entered partiibot for both.
The bot was created and I received a token (censored below).
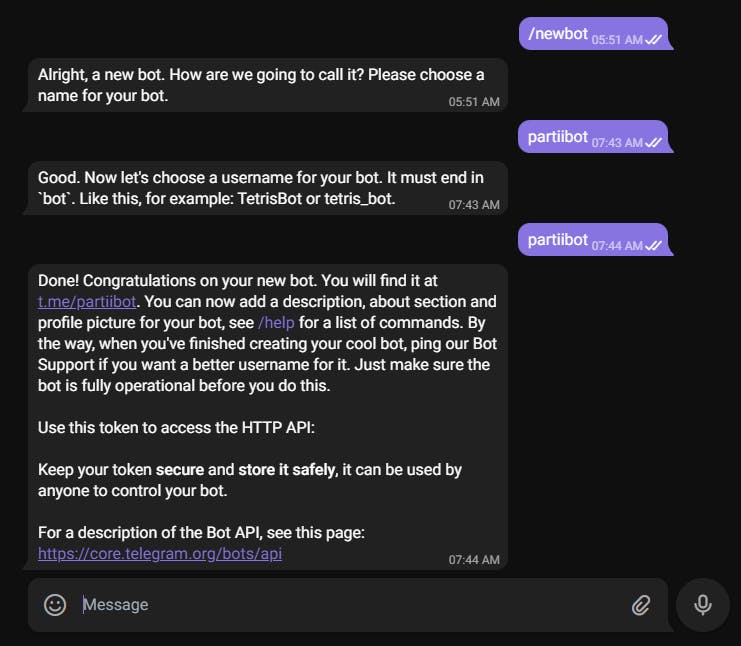
I saved the token somewhere safe. It is private so it's important not commit it to any code repository!
Creating a Code Repository
I needed a place to store the bot's code.
I already had a GitHub account, but if you're following along and don't like GitHub, GitLab, and Bitbucket also work great for what we're doing.
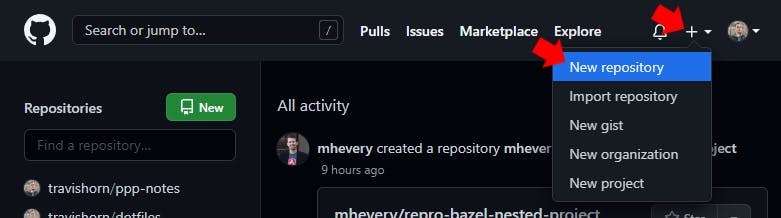
I went to github.com
I clicked on the plus icon in the upper-right corner, then clicked on New repository
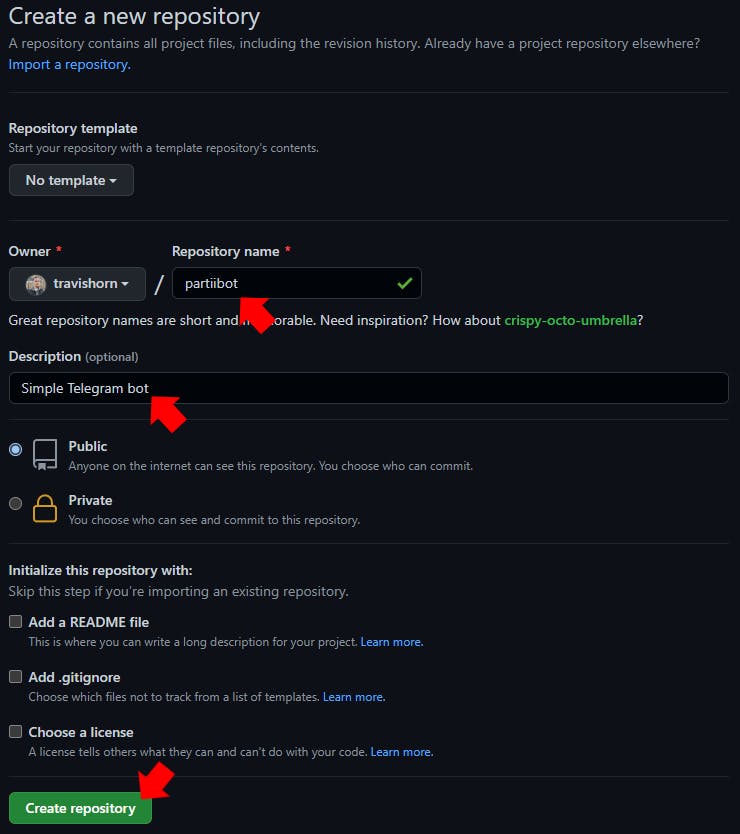
I named the repository partiibot. It makes sense to name it after the bot so I can keep everything consistent.
I typed an (optional) description and clicked Create repository
Cloning the Repository
If you're following along, you'll need Git set up for the next step, so make sure that's installed and working correctly.
I opened up a terminal and cloned the repository I just created.
git clone https://github.com/travishorn/partiibot
A new directory with my bot's name was created on my machine.
Initializing the Project
I changed into the bot's code directory
cd partiibot
If you're following along, you'll need Node.js set up for the next step. Make sure that's installed and working correctly.
I initialized a new npm package
npm init -y
This created a new filed called package.json.
I used to Git to track the file
git add package.json
Commit the file
git commit -m "Add package.json"
And push the changes to GitHub
git push
I've already pushed code to GitHub on this machine, but if you're following along and this is the first time you've pushed, you may see a window pop up to sign in to GitHub. If so, go ahead and do that.
Linking the Repository to Netlify
I knew I wanted to use Netlify and their Functions feature to deploy my bot. Netlify offers a generous free tier that will probably be more than enough to run the bot unless it gets very popular.
I already had a Netlify account, so I went to netlify.com and clicked Log in in the upper-right corner. Obviously, if you don't have an account yet, you can click Sign up.
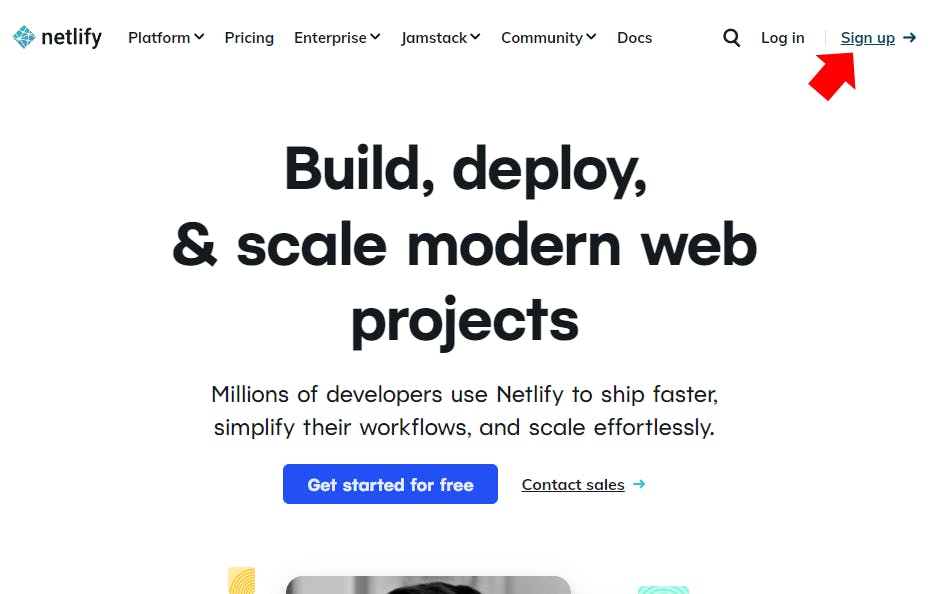
When signing up, click the name of the Git provider you're using. For example, I'm using GitHub so I'd click on that. From there, just authorize Netlify to access your account at your Git provider.
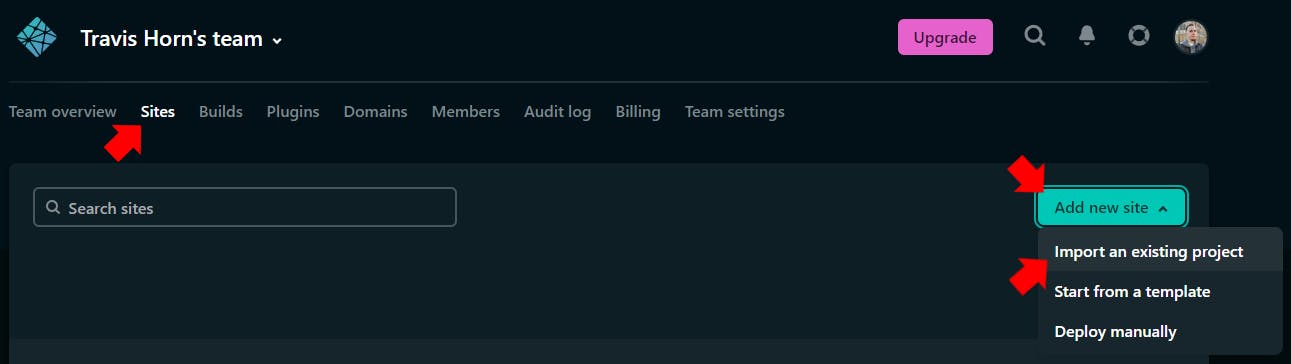
Once I was logged in, I clicked Sites, then Add new site, and Import an existing project.
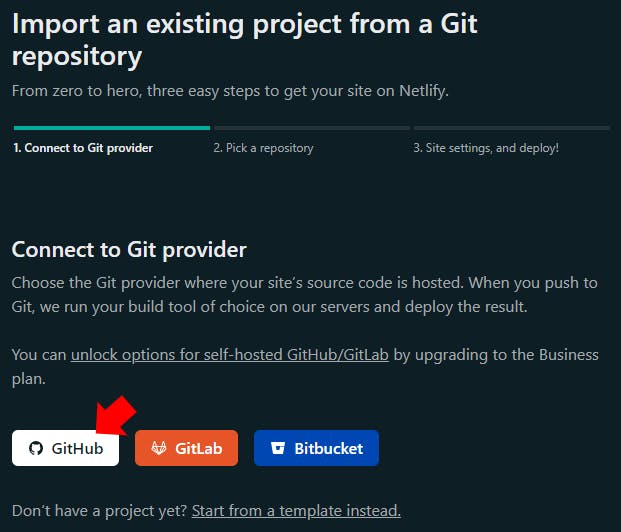
I clicked on my Git provider, GitHub
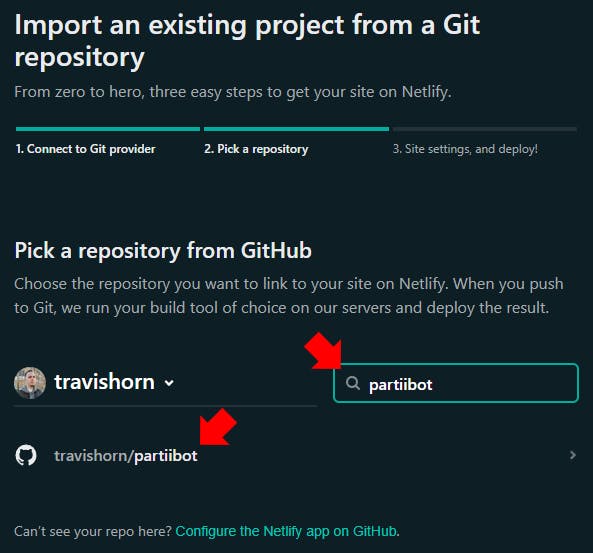
I searched for my bot's name and then clicked on it in the search results.
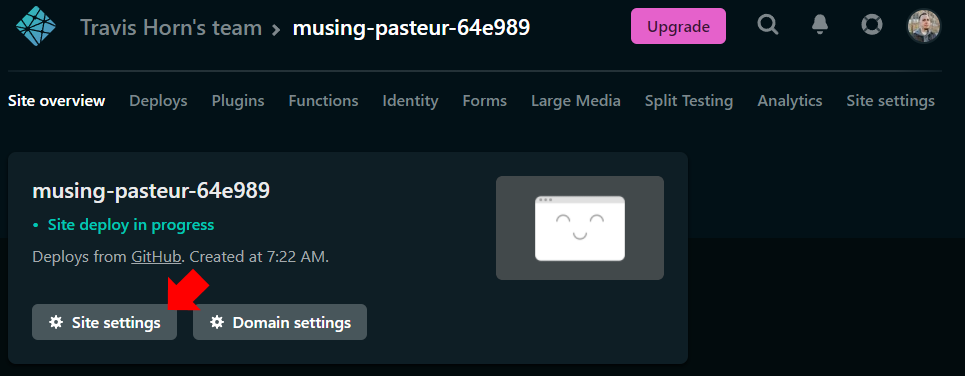
I left all of the defaults on this next screen and just clicked Deploy site.
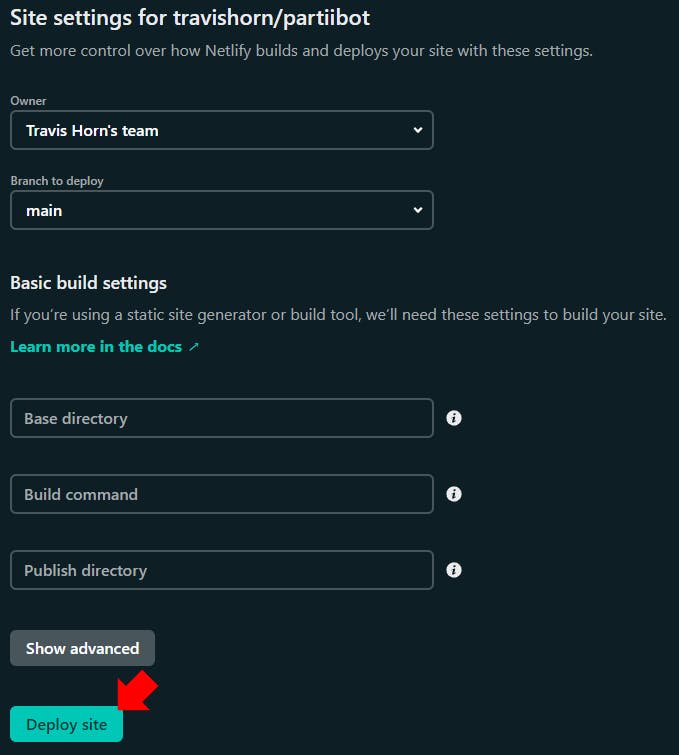
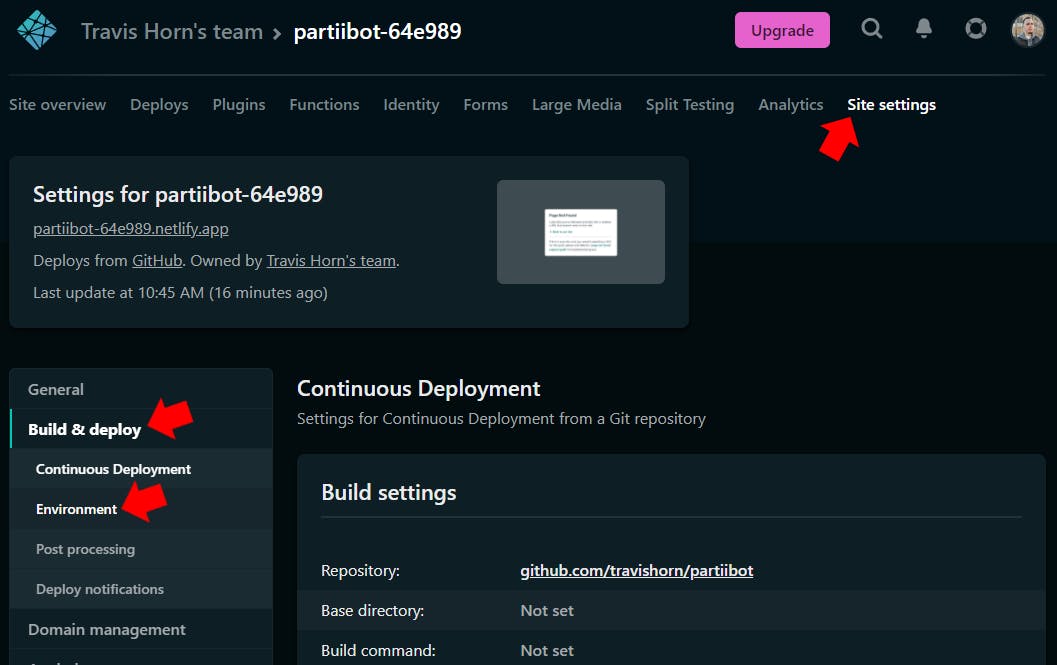
Netlify gave my new site a random name. I wanted to change that to stay consistent and make maintaining this code easier. I clicked on Site settings.
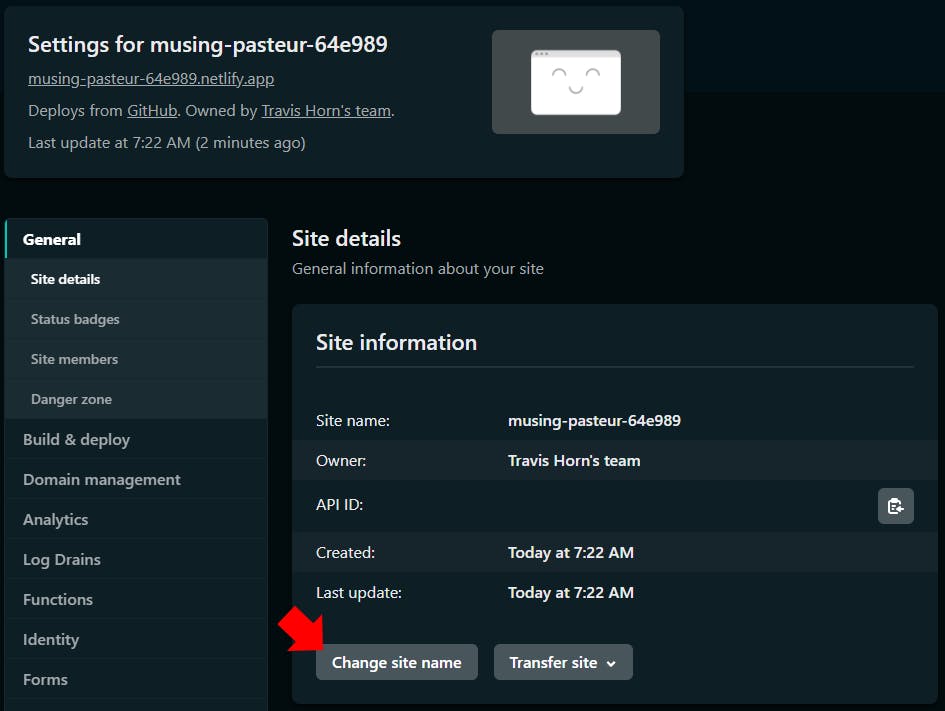
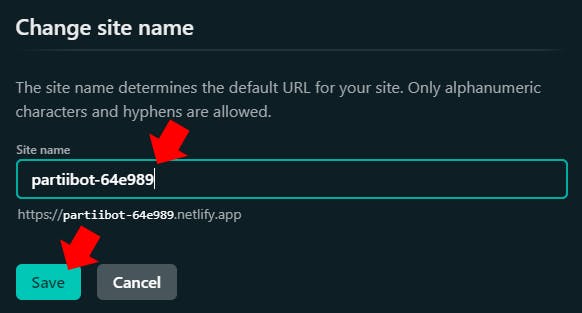
I clicked Change site name
I named the site with my bot's name. I did leave the random alphanumeric string at the end of the name, which is something I recommend. This makes it less likely that someone else will run your Netlify serverless functions. You really only want Telegram's API to know about it.
After entering the name, I clicked Save
Adding the Bot Token
Netlify needed to know the Telegram bot token so it could use it while executing serverless functions. The best way to provide the token is as an environment variable.
While still in the Site settings for my bot, I clicked Build & deploy and then Environment.
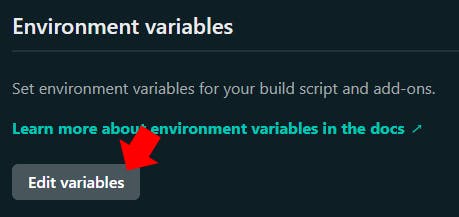
I clicked Edit variables
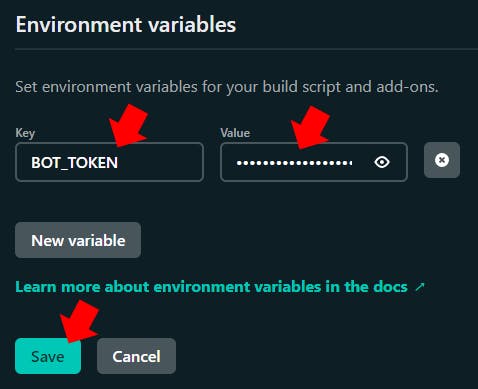
Under Key, I typed BOT_TOKEN
Under Value, I pasted the bot token given to me by BotFather earlier
I saved the settings by clicking Save
Setting the Webhook
Telegram has to know where to send message data when a user interacts with the bot. This is done by setting the webhook. I wanted Telegram to send data to a Netlify function I'd set up shortly.
Since I already set up the Netlify site name, I knew the URL where the serverless function would eventually live:
https://<site name>.netlify.app/.netlify/functions/update
So my function will live at:
https://partiibot-64e989.netlify.app/.netlify/functions/update
Nothing is there, yet. But it will be. I set the webhook to this URL now using curl. The basic syntax is:
curl -F "url=<netlify URL from above>" https://api.telegram.org/bot<bot token>/setWebhook
So for me, I ran curl like this:
curl -F "url=https://partiibot-64e989.netlify.app/.netlify/functions/update" https://api.telegram.org/bot520...censored...e_c/setWebhook
Success! I received an OK response
{"ok":true,"result":true,"description":"Webhook was set"}
Write the Serverless Function
Now we're ready for some actual coding!
I opened the directory with my favorite code editor. I'm using VS Code but any code editor works.
code .
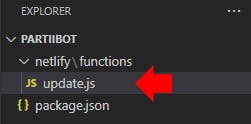
By default, Netlify builds functions that appear in YOUR_BASE_DIRECTORY/netlify/functions. So I created a new file at netlify/functions/update.js
I exported an async handler function that takes an event and returns an object with a statusCode
exports.handler = async (event) => {
  console.log("Received an update from Telegram!", event.body);
  return { statusCode: 200 };
};
I tracked, committed, and pushed this change
git add netlify/
git commit -m "Telegram update function stub"
git push
Within seconds, I saw the production deploy automatically on Netlify.
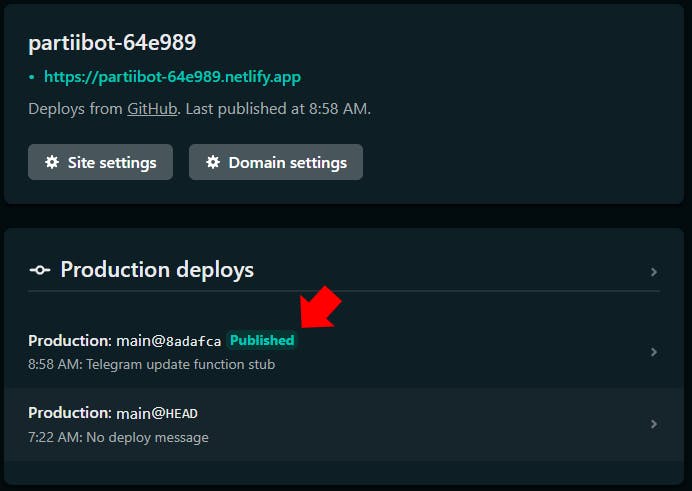
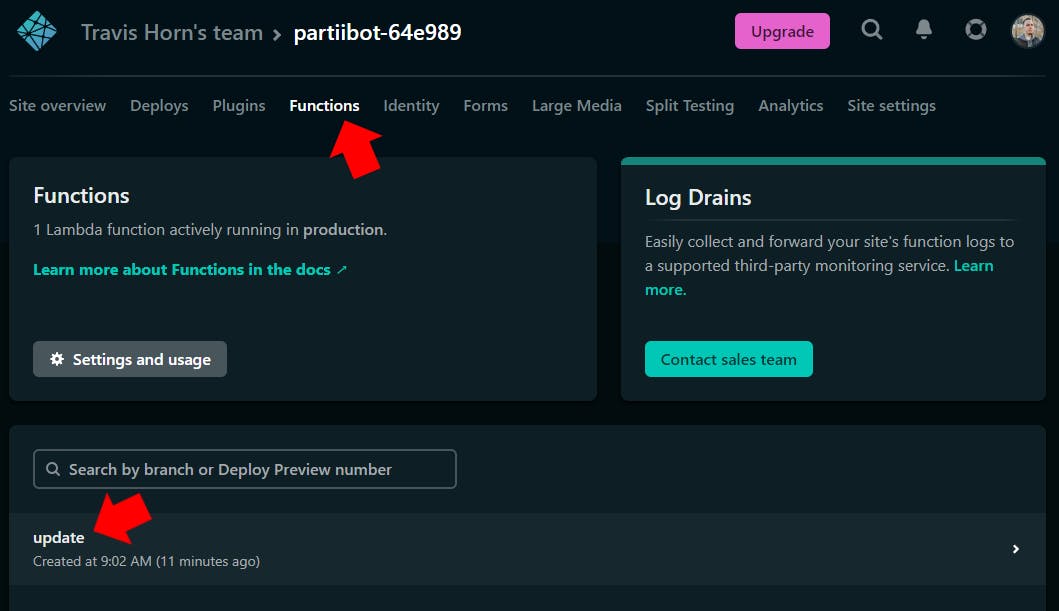
I found my built update function by clicking Functions. I viewed its logs by clicking its name, update.js.
With the logs open, I tried sending a message to my bot. Hint: you can start a new conversation by visiting t.me/<bot name>. So for me, I visited t.me/partiibot.
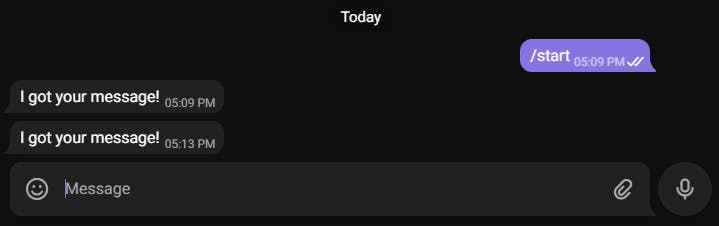
Telegram starts all bot conversations by having the user send /start. Shortly after I sent /start, I saw the log output on Netlify!
Feb 12, 09:19:17 AM: e5b24dea INFO   Received an update from Telegram! {"update_id":95557600,
"message":{"message_id":3,"from":{"id":123456789,"is_bot":false,"first_name":"Travis","last_name":"Horn","language_code":"en"},"chat":{"id":123456789,"first_name":"Travis","last_name":"Horn","type":"private"},"date":1644679156,"text":"/start","entities":[{"offset":0,"length":6,"type":"bot_command"}]}}
Feb 12, 09:19:17 AM: e5b24dea Duration: 3.30 ms    Memory Usage: 56 MB    Init Duration: 167.28 ms
Here's a formatted version of that event.body object:
{
  "update_id": 95557600,
  "message": {
    "message_id": 3,
    "from": {
      "id": 123456789,
      "is_bot": false,
      "first_name": "Travis",
      "last_name": "Horn",
      "language_code": "en"
    },
    "chat": {
      "id": 123456789,
      "first_name": "Travis",
      "last_name": "Horn",
      "type": "private"
    },
    "date": 1644679156,
    "text": "/start",
    "entities": [
      {
        "offset": 0,
        "length": 6,
        "type": "bot_command"
      }
    ]
  }
}
Responding to Messages
Sending a message from a bot involves issuing an HTTP POST request to Telegram. I prefer to use the Axios HTTP library for that.
npm install axios
Installing npm packages creates a node_modules directory that should not be tracked with Git. So I added a .gitignore file with the following line
node_modules
Then I required axios in netlify/functions/update.js
const axios = require("axios").default;
The URL that you must POST to when sending a Telegram message from a bot is:
https://api.telegram.org/bot<bot token>/sendMessage
Since I already set up Netlify with the BOT_TOKEN environment variable, I could construct the URL easily:
https://api.telegram.org/bot${process.env.BOT_TOKEN}/sendMessage
I had Axios issue a POST request to this URL
await axios.post(`https://api.telegram.org/bot${process.env.BOT_TOKEN}/sendMessage`, {
  // TODO: Add form data
});
The sendMessage endpoint accepts some form data. I used these two fields:
chat_id: The ID of the chat to send the message totext: The actual content of the message you want to send
The chat_id is going to be the ID of the chat that invoked the function. The text will just be some hardcoded filler for now. So the full post request looked like this:
await axios.post(`https://api.telegram.org/bot${process.env.BOT_TOKEN}/sendMessage`, {
  chat_id: JSON.parse(event.body).message.chat.id,
  text: "I got your message!",
});
That block went just before return { statusCode: 200 };
I staged, committed, and pushed the changes once again
git add netlify/functions/update.js
git add package.json
git add .gitignore
git add package-lock.json
git commit -m "Respond to messages"
git push
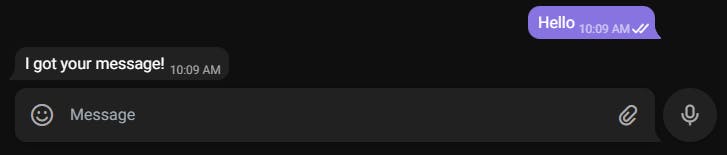
Once Netlify picked up the push and rebuilt the site, I sent another message to my bot. It responded with the hardcoded filler message!
Refactoring sendMessage
Soon, I wanted to parse the input message text and conditionally respond to it. It'll be helpful to refactor the Axios post into a separate function. I even put it in another file.
I created a new file in the root of my project (alongside package.json) called sendMessage.js. Why not inside the netlify/functions directory? Because all .js files in that directory will be built into serverless functions by Netlify. This new file just contains a helper function.
Here's sendMessage.js:
const axios = require("axios").default;

module.exports = async (chat_id, text) => {
  await axios.post(`https://api.telegram.org/bot${process.env.BOT_TOKEN}/sendMessage`, {
    chat_id,
    text,
  });

  return true;
};
Notice how this function takes a chat_id and text as arguments.
Back in netlify/functions/update.js, I removed the require call to Axios and replaced it with a require to the new sendMessage.js file.
const sendMessage = require("../../sendMessage");
Then, inside the handler, all I had to do is parse event.body, call sendMessage, and return with the statusCode.
const { message } = JSON.parse(event.body);
await sendMessage(message.chat.id, "I got your message!");
return { statusCode: 200 };
Here's the full netlify/functions/update.js file:
const sendMessage = require("../../sendMessage");

exports.handler = async (event) => {
  const { message } = JSON.parse(event.body);
  await sendMessage(message.chat.id, "I got your message!");
  return { statusCode: 200 };
};
Once again I staged, committed, and pushed the changes.
git add netlify/functions/update.js
git add sendMessage.js
git commit -m "Refactor sendMessage"
git push
After a very short moment, Netlify rebuilt the site and I tested the bot out by sending another message on Telegram. It responded just like before, which was the desired effect.
Better Local Development with Netlify Dev
So far, every change had required me to stage, commit, push, wait for Netlify to rebuild, and then test. Netlify actually lets you run their entire platform locally for development using a utility they call Netlify Dev.
First I installed Netlify CLI globally
npm install -g netlify-cli
Then I logged in using Netlify CLI
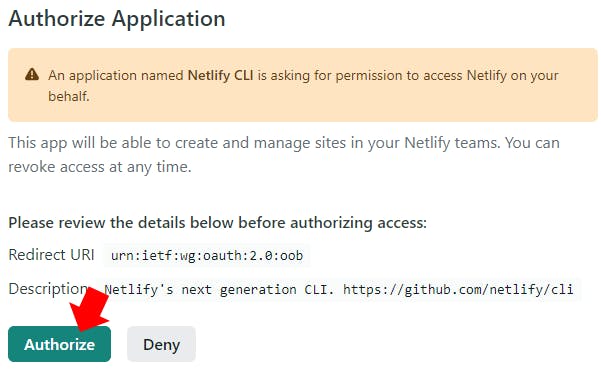
netlify login
A new browser window appeared and I clicked Approve
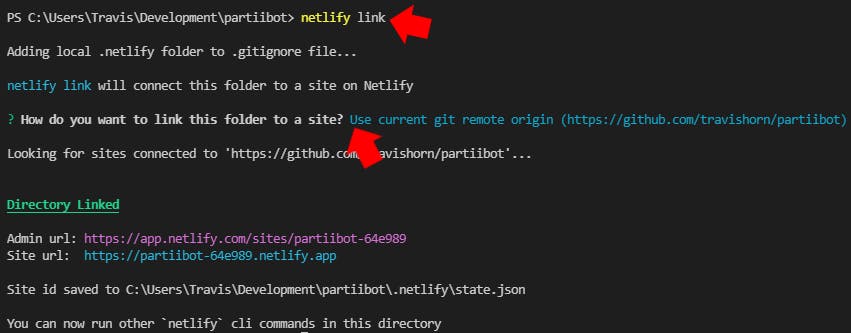
I linked the local code to the Netlify site using the CLI
netlify link
It asked me how I wanted to link the folder. I chose Use current git remote origin
With that configuration out of the way, I started up the local dev server
netlify dev
Netlify CLI will automatically opens a web browser to localhost:8888 which, in this case, doesn't lead anywhere. Instead, what we're interested in is the location of our function.
The function is located at localhost:8888/.netlify/functions/update. Notice how it's named after the filename, just without the extension.
If you try to visit that URL in your browser, you'll get an error. The function is expecting a POST request with specifically formatted data. For the next part, I could've continued to use curl to make HTTP requests, but I went with a more robust option.
I decided to use the REST client Insomnia.
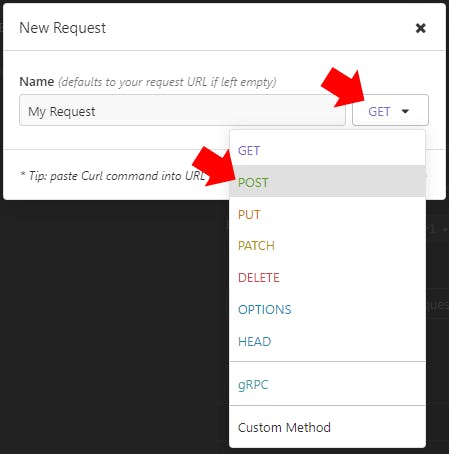
In Insomnia, I created a new POST request by clicking the plus icon on the left and then clicking New Request.

I left the name as is, but changed the type to POST
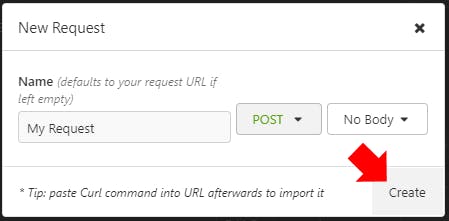
I created the request by clicking Create
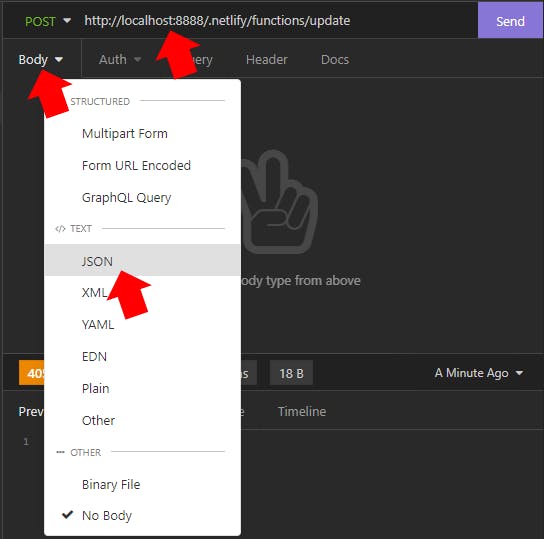
I set the URL to the endpoint of my function and then I changed the body type to JSON
The data I wanted to send was an emulation of what Telegram sends my bot when someone sends it a message. For that, I just copied the data from the message I sent it earlier. However, for the sake of simplicity, I removed everything except for the required keys. This left me with:
{
  "update_id": 95557600,
  "message": {
    "chat": {
      "id": 123456789
    },
    "text": "/start"
  }
}
I clicked send and saw the response was 200 OK as expected.

And the bot sent me a message on Telegram!
Now I could test without having to constantly push to GitHub and Netlify.
Making the Bot Understand Message Structure
As it stood, my bot only responded to all incoming messages with a single fixed message. In order to add conditional logic, my bot had to understand how messages to Telegram bots are constructed.
In a direct message with a bot, all messages are sent to the webhook URL. But I wanted my bot to be primarily used as a member of a group. In group messages, the bot might only have access to messages that start with a slash /. Furthermore, in groups, bots are usually addressed by typing their name after the at sign @. So if my bot was going to support a command called echo for example, I needed my bot to understand messages that looked like these examples:
/echo/echo Hello world!/echo@partiibot/echo@partiibot Hello world!
In order to get the command (echo in the examples above) I wrote a regular expression that grabs everything between the / and either the end of the string, a space, or an @.
(Bear with me because these can look confusing. Just understand that they grab different parts of the message.)
const commandMatch = message.text.match(/(?<=\/).*?(?=$| |@)/);
const command = commandMatch ? commandMatch[0] : null;
In order to get the bot name (partiibot) I wrote a regular expression that grabs everything between @ and either the end of the line or a space.
const botNameMatch = message.text.match(/(?<=@).*?(?=($| ))/);
const botName = botNameMatch ? botNameMatch[0] : null;
Finally, in order to get the extra argument (Hello world! in the examples above) I wrote a regular expression to grab everything between the first space and the end of the line.
const extraMatch = message.text.match(/(?<=\s).*?(?=$)/);
const extra = extraMatch ? extraMatch[0] : null;
I placed all of those new lines just after const message = ... in netlify/functions/update.js
Now I needed to make sure that the bot name (if it existed) matched my bot. That way, it won't respond to people who are trying to communicate with other bots in the same group.
After the lines above, I added an if statement. I moved the call to sendMessage inside it.
if (botName === "partiibot" || botName === null) {
  await sendMessage(message.chat.id, "I got your message!");
}
I saved the file which caused Netlify Dev to automatically rebuild the function in milliseconds. Then I used Insomniac to send a bunch of HTTP requests. I tested out various messages like the ones in the example list from earlier. My bot responded each time.
Then I tried changing the name of the bot I was sending the message to.
{
  "update_id": 95557600,
  "message": {
    "chat": {
      "id": 123456789
    },
    "text": "/echo@otherbot Hello world!"
  }
}
Just as expected, the response was an immediate 200 OK and no message was sent from my bot to my Telegram account.
For the sake of keeping everything clean, I refactored the regexes out into a separate function in a file called messageParts.js at the root of the project.
module.exports = (text) => {
  const commandMatch = text.match(/(?<=\/).*?(?=$| |@)/);
  const command = commandMatch ? commandMatch[0] : null;

  const botNameMatch = text.match(/(?<=@).*?(?=($| ))/);
  const botName = botNameMatch ? botNameMatch[0] : null;

  const extraMatch = text.match(/(?<=\s).*?(?=$)/);
  const extra = extraMatch ? extraMatch[0] : null;

  return {
    command,
    botName,
    extra,
  };
};
Now netlify/functions/update.js looks easier to read again.
const sendMessage = require("../../sendMessage");
const messageParts = require("../../messageParts");

exports.handler = async (event) => {
  const { message } = JSON.parse(event.body);
  const { command, botName, extra } = messageParts(message.text);

  if (botName === "partiibot" || botName === null) {
    await sendMessage(message.chat.id, "I got your message!");
  }

  return { statusCode: 200 };
};
At this point, I've done enough that it makes sense to commit the code changes.
git add .gitignore
git add sendMessage.js
git add netlify/functions/update.js
git commit -m "Message parts"
git push
Since pushing causes an rebuild on Netlify's side, this can be considered "deploying to production." Note that you can lock publishing to a specific deploy in Netlify. You can also use a workflow that involves deploying only on specific branches. So don't feel like git push can't be used without deploying to production; It's just how I have it set up at the moment.
Responding Conditionally to Commands
Right now, any time the bot receives a message directed at it, it responds with the same "I got your message!" text.
if (botName === "partiibot" || botName === null) {
  await sendMessage(message.chat.id, "I got your message!");
}
I replaced the await sendMessage() call with a switch statement that branches the code into different actions depending on the requested command.
switch (command) {
  case "echo":
    await sendMessage(message.chat.id, extra);
    break;
  default:
    await sendMessage(message.chat.id, "I don't understand that command.");
}
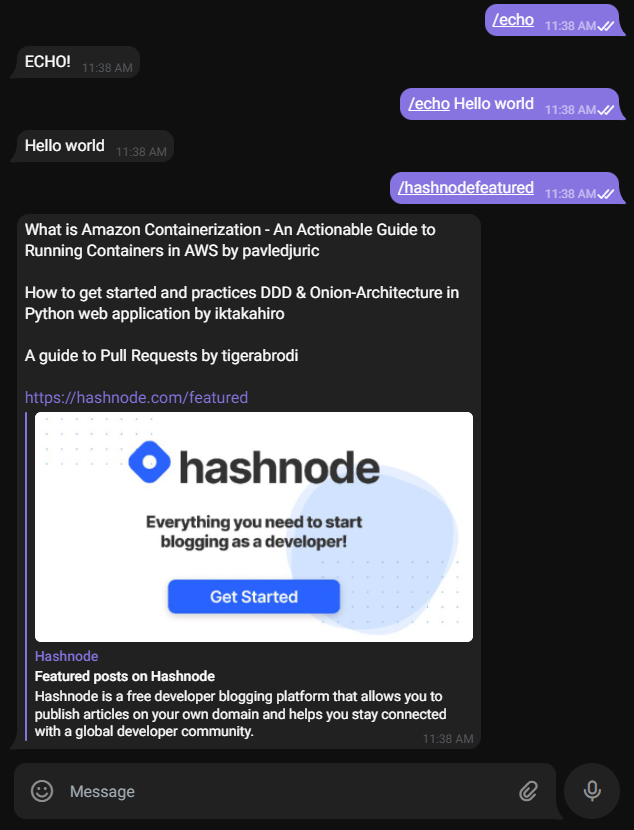
When someone sends the echo command, the bot replies with exactly what they wrote to it.
Notice how I included a default case, as well. That's useful in case someone directs a message to the bot but gives it a command it doesn't recognize.
I tested it out by using Insomnia to send a POST request to http://localhost:8888/.netlify/functions/update that looks like this:
{
  "update_id": 95557600,
  "message": {
    "chat": {
      "id": 123456789
    },
    "text": "/echo@partiibot Hello world"
  }
}
Since I still have netlify dev running, my bot responded as expected!

Sending an unknown command works, too.
{
  "update_id": 95557600,
  "message": {
    "chat": {
      "id": 123456789
    },
    "text": "/test@partiibot Hello world"
  }
}

What happens if someone sends /echo@partiibot but doesn't include any extra text in the message? The bot sees that as null and responds with "null". I fixed this by replacing...
await sendMessage(message.chat.id, extra);
with...
await sendMessage(message.chat.id, extra || "ECHO!");
If extra is null, the bot now responds with "ECHO!" instead of "null".

With the switch statement in place, I can keep adding case statements to build additional commands into the bot.
Using Hashnode's GraphQL API
The real power comes from the fact that we can use JavaScript and Netlify Functions to interact with third-party APIs. Wouldn't it be cool if a user could message the bot with a command that returns some featured Hashnode posts?
Hashnode provides a GraphQL API that allows anyone to (among many, many other things) pull a list of featured posts.
Check out the results when you query Hashnode's API with this query:
query {
  storiesFeed(type: FEATURED) {
    author {
      username
    }
    title
  }
}
The results look like this:
{
  "data": {
    "storiesFeed": [
      {
        "author": {
          "username": "pavledjuric"
        },
        "title": "What is Amazon Containerization - An Actionable Guide to Running Containers in AWS"
      },
... and so on
I want to hook into this API with my bot, have it parse the results, and reply to the user with a friendly list of posts.
I wrote a new file called hashnode.js at the root of my project.
const axios = require("axios").default;

const get = async (query) => {
  const res = await axios.post("https://api.hashnode.com/", { query });
  return res.data.data;
};

const featuredPosts = `
  query {
    storiesFeed(type: FEATURED) {
      author {
        username
      }
      title
    }
  }
`;

module.exports = {
  getFeaturedPosts: () => get(featuredPosts),
};
This file exports a method called getFeaturedPosts() which will use Axios to query Hashnode's API for the latest featured posts.
Back in netlify/functions/update.js, I required the file at the top.
const hashnode = require("../../hashnode");
Then I added a new case to the switch.
case "hashnodefeatured":
  // To do: pull latest featured articles
  break;
Inside this case, I pulled the latest featured posts.
const featured = await hashnode.getFeaturedPosts();
Then I constructed a reply containing the top 3 posts and a link to the Hashnode Featured page.
const reply = `
${storiesFeed[0].title} by ${storiesFeed[0].author.username}

${storiesFeed[1].title} by ${storiesFeed[1].author.username}

${storiesFeed[2].title} by ${storiesFeed[2].author.username}

https://hashnode.com/featured
`;
I saved the file and sent a POST request to my locally running bot at localhost:8888/.netlify/functions/update.
{
  "update_id": 95557600,
  "message": {
    "chat": {
      "id": 123456789
    },
    "text": "/hashnodefeatured@partiibot"
  }
}
The bot responded with the latest featured posts!

The Final Push
Now that everything is working locally, it's time to make another push to GitHub which will trigger a rebuild on Netlify. Within seconds, I was able to chat directly with my bot.
I can also add the bot to groups I administrate. Everyone in those groups will be able to use the bot by issuing commands like /echo Hello world or /echo@partiibot Hello world.
Telling Telegram about the Commands
While not necessary, it's very helpful to let Telegram know which commands your bot knows. To do this, I just talked to BotFather again. I sent him the /setcommands command and he guided me through it.
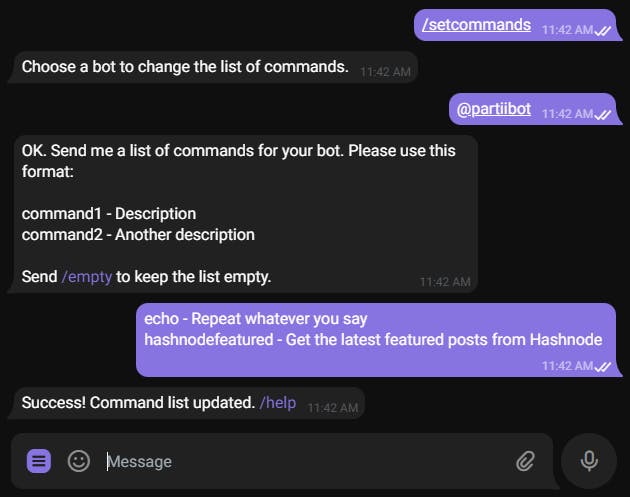
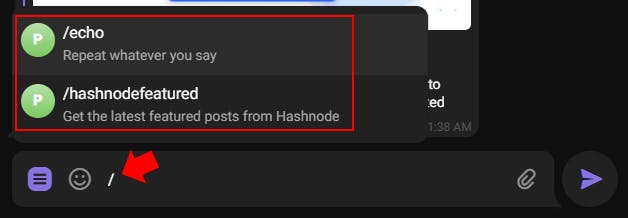
Now whenever someone chats with partiibot, they can issue commands directly with the command button.
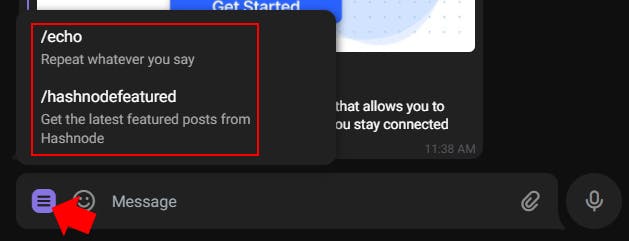
It will also recommend autocomplete commands as soon as they start typing /.
Ideas for the Future
That's it!
I skipped out on so many concepts and features in the interest of keeping this article short. If you're replicating this project, there's so much you can do. Here are some good ideas you could build into this project:
- Actual error handling
- Well-written tests
- Refactoring commands into their own separate files
- Make the bot name an environment variable and then reuse the code to make multiple bots
- Use
parse_mode: "MarkdownV2"when issuing asendMessageto format your messages with bold, italics, etc - Unlimited potential for bot commands...
- Random number generator
- Random jokes
- Magic 8 ball answers
- Integrating with other third-party APIs...
- Use other Telegram methods besides
sendMessagesuch assendPhoto,sendPoll,banChatMember,pinChatMessage,approveChatJoinRequest, etc
Of course, you can chat with partiibot by adding it to your Telegram group or start an individual chat at t.me/partiibot . But the real treasure is using the knowledge and techniques from my experience in this post to make something clever yourself.
The full code for this bot can be found on GitHub.
Get bot-building!