 Travis Horn
Haskell Development on Windows
If you run Windows and you’re interested in Haskell but not sure how to get set up, check out this guide. The process isn’t too hard, but it might be a little more intimidating than other, more popular languages.
While I do recommend a Linux environment over Windows for Haskell development, there are a number of reasons why you’d want to do it in Windows. And it’s really never been easier.
Thanks to other talented developers, today we have many modern tools available. Keep reading to learn how to install and use…
- The Haskell Tool Stack - build tool
- HLint - code linting
- Haskell Syntax Highlighting in VS Code
- GHCi - the compiler’s interactive mode
- ghcid - auto-reload and evaluation code on change
This guide is not an introduction to the language itself. Instead, it’s a guide on setting up an environment for coding.
Install Stack
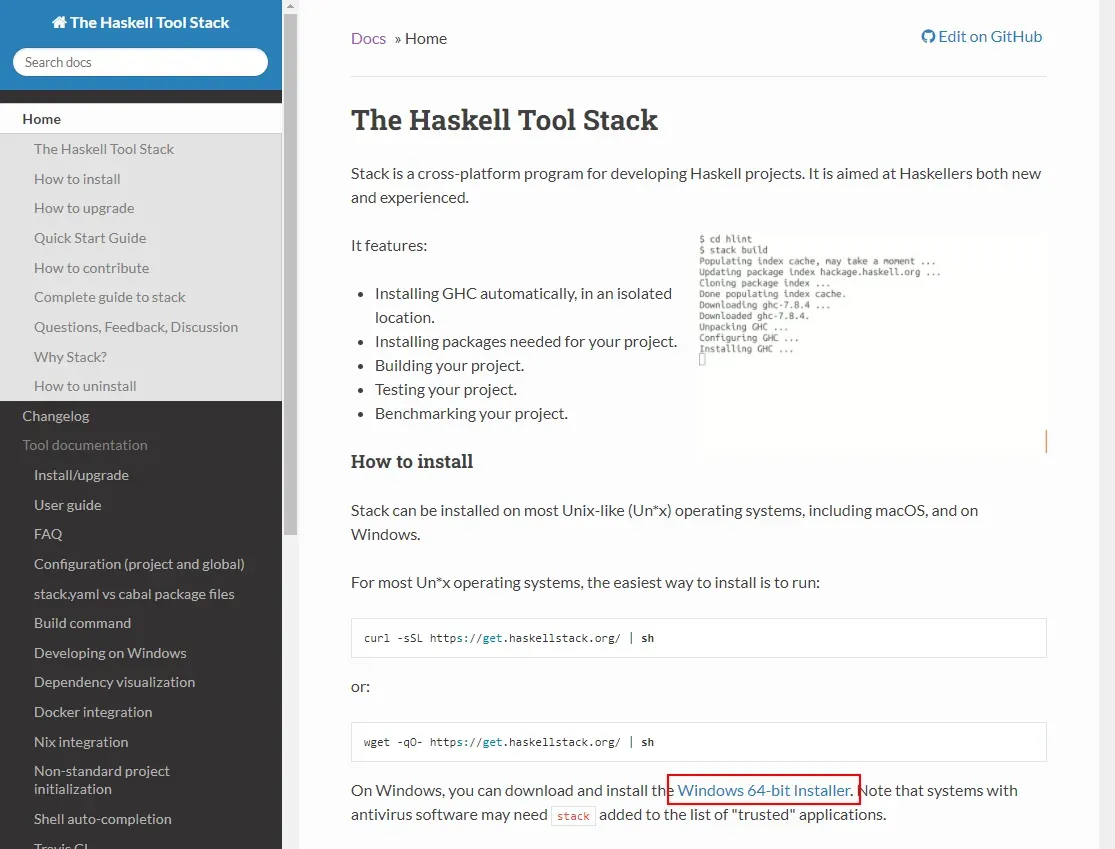
Go to the Stack docs.
Scroll down and click on the link for Windows 64-bit installer.
Once the download finishes, run the installer.
Follow the steps in the installer. For most people, you’ll want to accept any defaults.
Install HLint
HLint gives suggestions on how to improve your source code. It is a command line tool which you can point at any of your source files and it will show suggestions.
Even better, there’s an extension for VS Code that will run HLint on your code as you work, giving suggestions right in the editor.
The easiest way to install HLint is to use Stack to “globally” install it.
Normally, this would be as simple as running stack install hlint.
Unfortunately, there is some misconfiguration for Windows installations. Here’s
my suggestion for a workaround.
You’ll want to create a new stack project for holding all your “global” packages.
Open up a command prompt. cd to a good directory for storing your development
files. For example, I use C:\Users\travis\Development. Once you’re there,
create a new stack project called stack-globals.
stack new stack-globalsEdit stack-globals\stack.yaml
Somewhere around line 46, you’ll see a commented out line.
# flags: {}Replace that line with the following.
flags:
  mintty:
    win32-2-13-1: false
Save the file.
Now in the command prompt, make sure you’re in the stack-globals directory and
run:
stack install hlintIt may take a minute or two, but when the process is complete, you’ll have HLint installed. You can make sure by getting the HLint version.
hlint --versionIf it doesn’t run, the local bin directory might not be in your PATH. Stack
can tell you where the directory is.
stack path --local-binAdd that directory to your
PATH.
Now hlint is available everywhere from the command line.
Syntax Highlighting and Code Hints in VS Code
If you use Visual Studio Code like I do, you’ll want a few extensions.
In the Extensions panel (Ctrl + Shift + X), search for and install:
- Haskell Syntax Highlighting by Justus Adam
- haskell-linter by Cody Hoover
Note that haskell-linter only works if you’ve got hlint installed (see the previous section above).
Why don’t I install the Haskell extension?
There is an extension called Haskell that provides some really awesome features for Haskell development. It’s powered by the Haskell Language Server. The developers working on the language server and the extension have done some really amazing work.
However, in my experience, it just doesn’t work quite well in Windows yet. It takes a long time to load and gets stuck a lot. The references and definitions sometimes break, requiring a restart of the language server or VS Code altogether.
I’m sure it will get better over time and I can’t wait for quicker and more stable versions for Windows in the future.
Starting a new project
Open up a command prompt. cd to a good directory for storing your development
files. For example, I use C:\Users\travis\Development. Once you’re there,
create a new stack project. You can give it any name you want. I’ll use
my-project.
stack new my-projectOpen the newly created directory in your favorite code editor.
code my-projectWorkflow
All of your coding should be done in the src\ directory.
In a new Stack project, you’ll see src\Lib.hs which exports a single function
called someFunc.
Notice how this function gets imported and used in app\Main.hs. You’ll
probably decide to rename Lib and also export more than just someFunc. Make
sure to update app\Main.hs when you do so.
Run your code interactively
To use GHC’s interactive environment, just tell Stack to launch it.
stack ghciIt may take a minute the first time. Stack has to prepare a new environment
according to the configuration in package.yaml and stack.yaml for the first
time.
Once GHCi opens, you’ll be able to give commands to the compiler interactively.
Any time you make a change to a file, reload the changes with :r
Automatically reload on file changes
If you find yourself consistently reloading modules and running the same command over and over, you can try using ghcid which is a lightweight program which monitors for file changes and reloads your code.
Install it globally by opening a command prompt and navigating to the
stack-globals directory we created earlier in this guide.
Install ghcid.
stack install ghcidOnce it finishes downloading and compiling, ghcid will be available to use from the command line.
Go back into your project’s directory and run it with the following flags.
ghcid --command=stack ghci --test=mainThis will launch GHCi and automatically call the main function. Feel free to
change main to something else if there’s another function you’re consistently
running.
Every time you save a file, ghcid will reload your modules and re-run the test function. It works pretty fast, too.
Adding packages
You might want to use some packages that were developed by the community. For example, the text package is very popular.
Add it to package.yaml in the dependencies section.
dependencies:
  - base >= 4.7 && < 5
  - text
Note that base was already there from the default Stack template. All you need
to add is the - text line.
Now you can use the modules in the text package. For example:
{-# LANGUAGE OverloadedStrings #-}

module Lib
    ( someFunc
    ) where

import qualified Data.Text.IO as T

someFunc :: IO ()
someFunc = T.putStrLn "someFunc"
Keep in mind that the first time you build your project after defining a new dependency, Stack will have to download and compile it and all of its dependencies. It might take a while the first time.
Building the project
Build the project using Stack.
stack buildOnce all the code is compiled and the executable is built, you can run it using Stack.
stack exe my-project-exeIf you want to distribute the executable or run it without using Stack’s help, you can put the executable on your path.
stack installThis does the same thing as stack build, but also copies the built executable
into your local bin directory, which should be on your PATH so you can just
call the executable.
my-projectIf it doesn’t run, the local bin directory might not be in your PATH. Stack
can tell you where the directory is.
stack path --local-binAdd that directory to your
PATH
or navigate to it and run the executable from there.
Setting up a Haskell development environment is getting easier over time. I’m excited for what the future holds for the language.