 Travis Horn
The xmonad Window Manager on Arch Linux

In the last article, we installed a barebones installation of Arch Linux. The base of the operating system is there now. But if you want to have a more graphical user interface, you might consider installing a desktop environment or a window manager.
Desktop environments are full-blown GUIs that manage your entire desktop experience. They are an awesome tool for a lot of people. However, a more minimal alternative is a window manager. All a window manager does is show each program you have running in its own window. Tiling window managers like dwm, i3, and xmonad are popular options for Linux.
I like xmonad. Follow along and I’ll show you how to set it up.
First, log in to your Linux machine as your primary non-root user. Mine is
travis but your user is probably named something different, according to what
you chose when installing the operating system.
Check time settings
If you’re following along this article series, you will have just finished installing Arch for the first time. We did enable time synchronization. However, we only did so on the live image. Since we’re now booting into the actual installed system, you’ll probably have to re-enable it.
Check the setting
timedatectl statusIf System clock synchronized shows no, go ahead and enable NTP again
sudo timedatectl set-ntp trueInstallation
The package manager pacman can be used to install all sorts of packages in Arch.
Before you install a new package, it’s good practice to synchronize the package database and update existing packages on your system.
sudo pacman -SyuInstall everything you need to run xmonad.
sudo pacman -S xorg-server xorg-xinit xmonad xmonad-contrib xterm ttf-fira-monoYou may notice that the command above installs a font named Fira Mono. I like this font, but feel free to search for and use another available monospace font if you prefer.
Create a new file called ~/.xinitrc
nano ~/.xinitrcThe commands you enter in this file will be ran every time you start the X Server. That is, every time you start the process for handling graphics displays.
Note: ~ is just an alias for your home directory.
Another note: A lot of the files you’ll be working with while setting things up
will begin with a dot (.). This just tells Linux that the file should be
“hidden.” Make sure to pay attention to these dots. They are important to get
right when entering commands and editing files.
Type the following single line in the file. This will ensure that xmonad is started every time you start X Server.
exec xmonadCreate a new directory for configuration
mkdir ~/.xmonadDownload this good example configuration file with safe defaults
curl -o ~/.xmonad/xmonad.hs https://archives.haskell.org/code.haskell.org/xmonad/man/xmonad.hsStart X Server, which will in turn start xmonad
startxBy default, you won’t see much but a black screen.

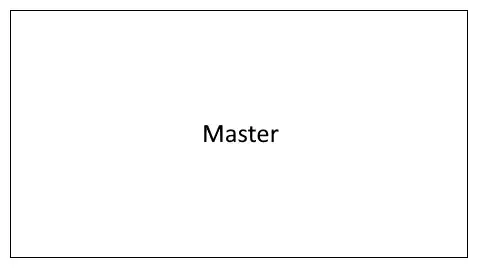
This is the default installation of xmonad. You can open a new terminal with Alt + Shift + Enter.
![A large white rectangle, outlined in red, with black text in the upper left
corner that reads [travis@arch ~]$.](/.netlify/images?url=_astro%2FMEYjetvGd.CBBHeyFH.webp&fm=webp&w=802&h=602&dpl=6a1f06d41b567000083b6653)
Try opening a second, third, and fourth terminal to see the tiling windows in action.
A single window takes up the full screen.
When you open a second window, it goes into the “stack” on the right side.
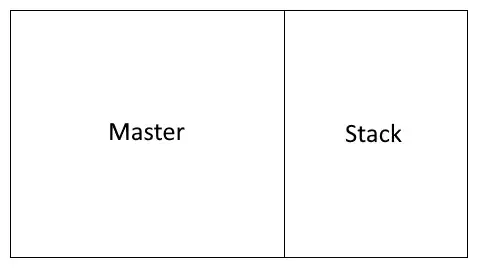
If you keep opening windows, they keep getting pushed into the stack.

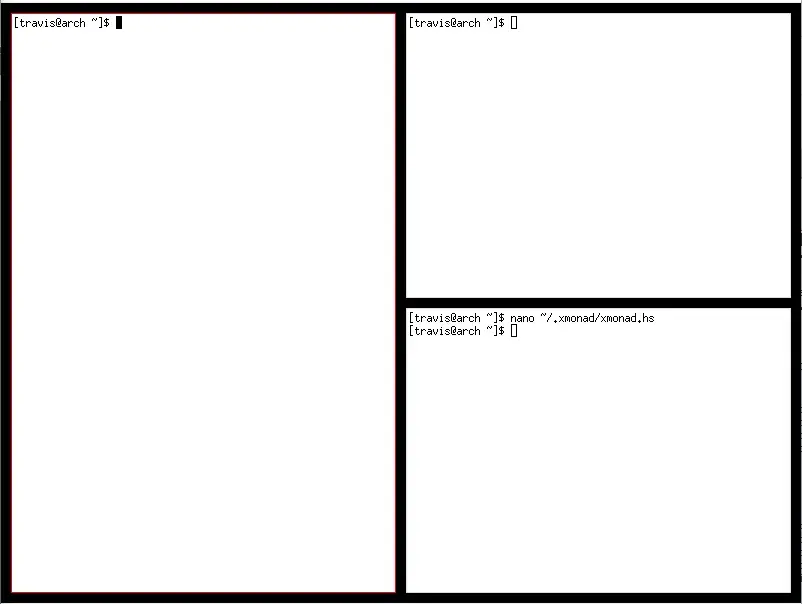
![A large white rectangle taking up 75% of the screen. To the right are three
smaller rectangles stacked one on top of the other. All four have black text
reading [travis@arch ~]$] in their upper left
corners.](/.netlify/images?url=_astro%2FfgODv-LPr.56JVvr0-.webp&fm=webp&w=802&h=604&dpl=6a1f06d41b567000083b6653)
xmonad also has “workspaces.” These are like virtual desktops. By default, you’re on workspace 1. But you can switch to any of them by pressing Alt + 1, Alt + 2 and so on (all the way up to 9).
How would you use this? Here’s an example: You may want a certain group of windows for editing code open on workspace 1, and then a fullscreen web browser on workspace 2. You can switch back and forth from workspace to workspace at any time with the key bindings.
You only need one terminal open right now, so close any extra ones with Alt + shift + c.
There are a ton of keyboard bindings for you to learn and use. Each of these will help you manage your windows. Once you learn these and get used to a regular workflow with them, you’ll be able to open, close, and navigate around your windows with lightning speed.
To get started, here are the most common keyboard bindings I use on a daily basis.
| Effect | Keys |
|---|---|
| Launch a new terminal | Alt + Shift + Enter |
| Close a window | Alt + Shift + c |
| Focus on next window | Alt + Tab |
| Focus on previous window | Alt + Shift + Tab |
| Make the focused window master | Alt + Enter |
| Shrink master area | Alt + h |
| Expand master area | Alt + l |
| Move window to another workspace | Alt + Shift + 2 |
| Switch to another workspace | Alt + 2 |
| Restart xmonad | Alt + q |
| Quit xmonad | Alt + Shift + q |
You can view all keyboard bindings in xmonad’s manual page.
Gaps
Personally, I like to have some gaps between my windows. It simply looks better to me. If you want gaps between your windows, too, you can configure xmonad to do this.
Edit your xmonad configuration file
nano ~/.xmonad/xmonad.hsAt the top of the file, next to the other import statements, add the following
new line
import XMonad.Layout.Spacing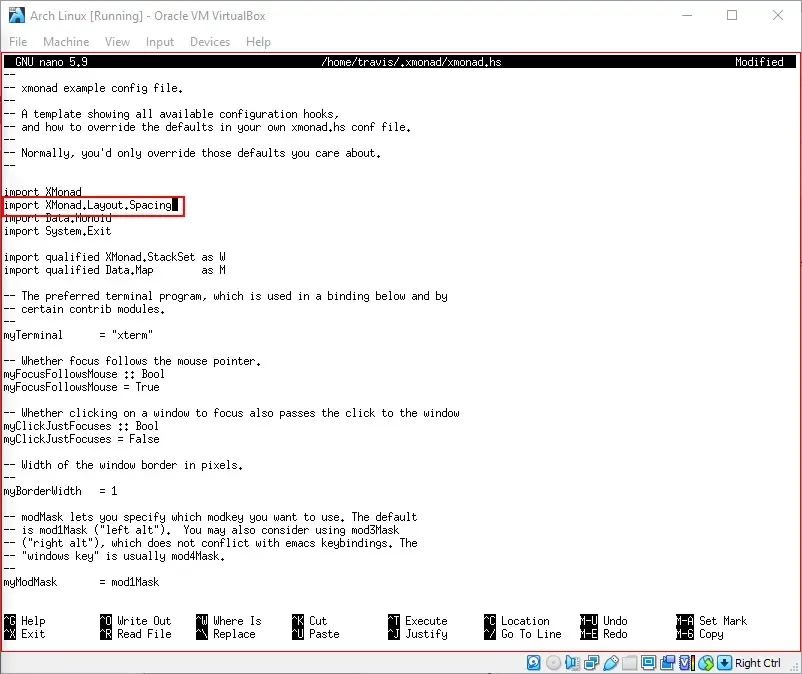
Scroll down and find the Layouts section. Add the following lines above the
line that reads myLayout = [...]
mySpacing = spacingRaw False            -- False=Apply even when single window
                       (Border 5 5 5 5) -- Screen border size top bot rght lft
                       True             -- Enable screen border
                       (Border 5 5 5 5) -- Window border size
                       True             -- Enable window borders
Everything is set to have a 5 pixel gap around it, but feel free to adjust to your liking.
We need to apply this mySpacing function to the layout. Modify the line that
currently says
myLayout = tiled ||| Mirror tiled ||| Fullto read
myLayout = mySpacing $ tiled ||| Mirror tiled ||| Full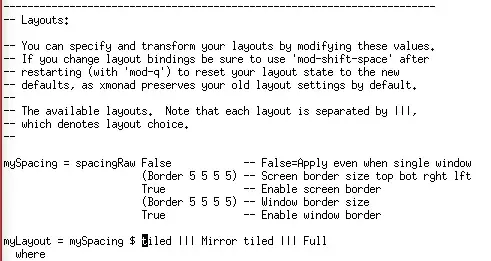
Exit and save the file
Restart xmonad (Alt + q) and open a few windows to see the gaps in action.
Wallpaper
The default black background is a little boring. We can set a custom image with a tool called feh.
Install feh
sudo pacman -S fehFind a nice wallpaper online to download. Once you’ve found one, make note of its URL. If found this nice photo taken by a person named tilted_tripod that is free to use under the Unsplash License.
Make a directory for wallpapers
mkdir -p ~/images/wallpapersDownload the image. Replace sunset.jpg and the URL with the appropriate values
for your image
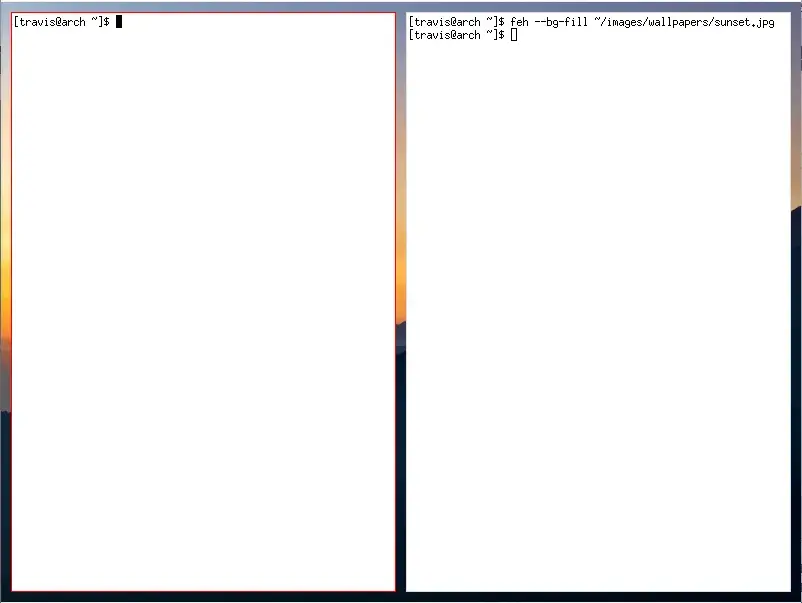
curl -o ~/images/wallpapers/sunset.jpg https://images.unsplash.com/photo-1639400440317-54a35a504ef7Use feh to set it as your wallpaper
feh --bg-fill ~/images/wallpapers/sunset.jpgClose any open windows and you should be able to see your new wallpaper!
If you have gaps between your windows, you should be able to see it through them, too.
In addition to setting the wallpaper, feh also creates an executable file in
your home directory called ~/.fehbg which restores the wallpaper any time you
run it. You can tell xmonad to run this executable at startup.
Edit your xmonad configuration
nano ~/.xmonad/xmonad.hsIn your imports section, add a line importing run modules
import XMonad.Util.RunFind the call to main that looks like this:
main = xmonad defaultsand update it to this:
main = do
  xmproc <- spawnPipe "~/.fehbg"
  xmonad defaults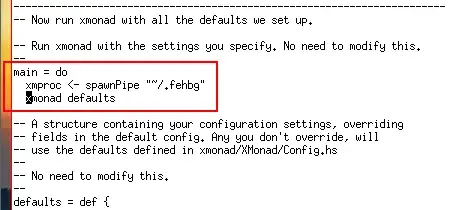
Exit and save the file.
The wallpaper should automatically appear when you start xmonad from now on. You
can test this by quitting xmonad (Alt + Shift + q) and starting it again
(startx).
Other customizations
One of the other things that bothers me about the default configuration is the red border that appears around the active window. I prefer a more subdued blue color.
Use nano to edit the xmonad configuration at ~/.xmonad/xmonad.hs again.
Find and update the following line to increase the border width from 1 to 2
myBorderWidth = 2Find and update the follow line to change the focused border color to a nice blue.
myFocusedBorderColor = "#007acc"Exit and save the file, then restart xmonad to view the changes (Alt + q)
While it’s looking better already, I can’t wait to customize our terminal. Right now we’re looking at the default xterm. It works, but it’s not very pretty in my opinion. I’ll talk about setting up and customizing a new terminal in a future article. For now, let’s take a few more steps to make our window manager the best it can be.
Starting your window manager at login
If you know you want to use xmonad (or any window manager you might be using for
that matter) every time you log in, it makes sense to run startx automatically
at login.
Use nano to add the following lines to ~/.bash_profile. Make sure not to
delete anything that’s already in there. Just add these lines.
if [ -z "${DISPLAY}" ] && [ "${XDG_VTNR}" -eq 1 ]; then
  exec startx
fi
Exit and save the file
The code above runs exec startx if the detected virtual console is the first
one. For now, you don’t really have to worry about virtual consoles, but it’s
good to know for the future.
The important part of the code is exec startx. By including exec, your
system will automatically log you out any time the window manager is killed.
This is considered a security best practice.
That’s it! You can test that xmonad starts at login by closing xmonad with **Alt
- Shift + q** and then running
logoutto log out. Type your username and password again to log in. xmonad should launch automatically.
Extra: picom
picom is a compositor for Linux. It is especially popular with the Arch Linux distribution.
Compositors allow things like transparency and other effects in window managers. It’s useful to start a compositor when launching your window manager.
Install picom
sudo pacman -S picomEdit your xmonad config file at ~/.xmonad/xmonad.hs to add the following line
main = do
  xmproc <- spawnPipe "~/.fehbg"
  xmproc <- spawnPipe "picom"
  xmonad defaults
If you’re using VirtualBox, picom will throw errors because of vsync. I usually disable vsync. This isn’t a great solution, because vsync prevents screen tearing when watching video or playing games. But disabling it is the easiest way to get picom working in this setup.
Copy the default configuration to your home directory
mkdir -p ~/.config/picom
cp /etc/xdg/picom.conf ~/.config/picom/picom.conf
Edit ~/.config/picom/picom.conf
Uncomment the line that disables vsync and
comment out the line that enables it
vsync = false;
#vsync = true;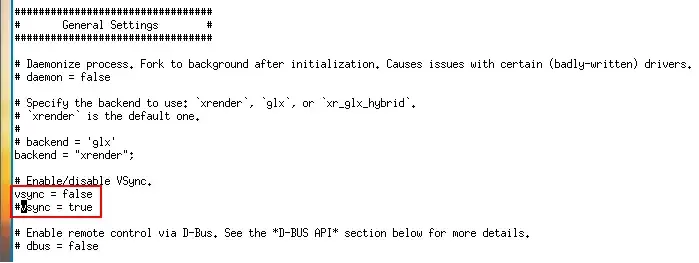
The effects of running a compositor like picom might not be completely apparent at first glance. But if your window manager takes advantage of things like transparency, you might notice things like windows fading in and out when opened and closed. Of course, you’ll need to restart xmonad first.
Now we’ve got a new installation of Arch running the xmonad window manager.
We’ve customized it slightly to match our tastes. You can keep poking around
xmonad.hs to customize xmonad even further. There is a lot you can do,
especially if you know the Haskell programming language.
In future articles, I’ll show you how to set up a new terminal emulator (Alacritty), status bar (xmobar), and text editor (Vim).